
How to teach a child embroidery
Embroidery for kids.
Did you know that embroidery isn’t just for adults? That’s right. Little ones from the age of 6 can learn the beautiful art of embroidery too. Embroidery is a fun activity for kids. It is also helpful to develop their little brains. In this guide we will tell you everything you need to know about how to teach a child embroidery.
On top of entertainment and brain stimulation, embroidery teaches them important life skills. Skills like problem-solving, creativity, and patience.
So grab your little one, get those kiddie embroidery supplies ready, and take them on a journey of endless creativity.
How do you do embroidery for kids?
Teaching children embroidery is a fun experience for both you and them! Embroidery is a great skill for any child to learn. Navigating through teaching them can become tricky. Especially if this is your first time teaching embroidery.
How do you make embroidery for kids?
Whether you are starting an embroidery school, or you just want to teach your own tots at home. We have compiled a step-by-step instructional manual for kids’ embroidery. Here you can learn about all the tools they’ll need, how to get them started, different types of kids embroidery, where to buy their kits, and so much more.
Table of Contents
Is embroidery good for kids?
Embroidery is good for kids. There are numerous ways that embroidery is beneficial for kids. Fabric8 is here to take you through all of the reasons why you should definitely teach your child embroidery!
Here are 20 benefits of embroidery for kids:
- It is good for their mental health.
- Reduces anxiety.
- Embroidery has a calming effect.
- It teaches kids problem-solving skills
- They’ll learn patience
- Math and estimation skills
- Encourages creativity
- Reduces screen time
- Gives them a career direction
- Allows them to be helpful
- Teaches them consistency
- Improves their hand-eye coordination skills
- Will improve their language
- Will improve their colour knowledge
- Develops their communication skills
- Improves their listening skills
- Allows them to bond with you
- Cultivates mindfulness
- Reduces stress
- Boosts their self-esteem
Children need something that will boost both their logic and their creativity. This is exactly what embroidery does. It boosts their logic by helping them develop math skills and estimation abilities.
It develops their creativity too. This is because embroidery allows them to think outside of the box and create with their imagination. Now that you know over 20 benefits of embroidery for your little one, you’re ready to start teaching them.
Is embroidery good for the brain? Why?
Embroidery is good for your mental health. It is also a good brain booster.
Here are 15 Ways embroidery can boost your mental health:
- It has a calming effect
- Reduces anxiety
- Soothes stress
- Reduces nervousness
- Allows for patience
- Stimulates being present
- Gives a sense of accomplishment
- Stimulates excitement
- Allows you to solve problems
- Creativity reduces stress
- Stimulates brain health
- Bonding experience
- Develops motor skills
- Expresses emotions
- Stimulates confidence
1. It has a calming effect
Just being able to sit down and create- that is calmness. Embroidery allows this. With embroidery, you can go into your safe space and come out of it when you choose to.
2. Reduces anxiety
Embroidery stimulates your mind. With an occupied mind, your chances of being anxious are reduced. It allows you to focus on your current task instead of anticipating future worries.
3. Soothes stress
Nothing soothes stress more than expressing your creativity. When you embroider, you can make your imagination come to fruition.
4. Reduces nervousness
Nervousness happens when your mind is fixated on an issue. However, embroidery counteracts this. When you’re creating, your brain releases happy hormones.
5. Allows for patience
Anyone that embroiders knows it takes patience! When your stitches aren’t coming out the way you expect them to. When you repeat the same mistake. Or when your fabric doesn’t work with your thread.
All of this requires patience. And patience is the best virtue!
6. Stimulates being present
Embroidery is a mindful practice. Visual arts is a great way to teach yourself to focus. It helps you calm your mind and eases anxious thoughts.
7. Gives a sense of accomplishment
Nothing feels better than getting that design just right! It leaves you with an accomplished feeling.
8. Stimulates excitement
When you finish a project, it stimulates excitement. And the process of finding new projects adds to that excitement.
9. Allows you to solve problems
Embroidery is not always perfect. Sometimes you’ll encounter strange situations. However, this allows you to develop your problem-solving skills.
10. Creativity reduces stress
Creativity releases happy hormones in the brain. This in turn reduces your stress hormones.
11. Stimulates brain health
With embroidery, you are learning math, problem-solving, creativity, patience, and motor skills. All these factors contribute to a healthy brain. Brain health leads to better mental health and improved mood.
12.Bonding experience
There’s a whole community of embroiderers out there. Whether you want to join an intimate class, embroider with your children, or join an online live stream. We have endless options to embroider socially.
Positive social interactions are beneficial to our mental health and well-being. It will also encourage you to stay motivated.
13. Develops motor skills
You’ll need hand-eye coordination for embroidery. It will keep your eyes, brain, and hand functionality sharp and on par.
14. Expresses emotions
With embroidery, you are in control. Whether you love dark colours or bright happy designs. Embroidery can be anything you want it to be.
15. Stimulates confidence
Once you learn a new skill, your confidence skyrockets. And let’s not forget about the healthy ego boost we get from mastering anything!
At what age can kids start embroidery?
What age can you teach embroidery?
A child can learn embroidery from age 5 to 6. This is because they can handle tools at this age, they have an understanding of the language you’ll be teaching, and they have developed creativity.
It is advised to monitor kids below the age of 11. Do not let them work unsupervised. You should still be there to ensure they are working safely and accurately.
Is learning to embroider hard?
Does embroidery take skill?
It is not difficult to learn how to embroider. Just like any other skill, everyone starts with no knowledge. This is why both young children and beginner adults can learn embroidery.
With practice, patience, and persistence you can master embroidery.
What is hand embroidery for kids?
What is hand embroidery?
Hand embroidery is a way of embroidery with your hands. The alternative is machine embroidery, where a sewing machine does the embroidery for you.
With hand embroidery, you’ll be using needles and thread. The entire project is handmade, from start to finish. There are two main types of hand embroidery: needlepoint and cross stitch.
What is the difference between cross stitch needlepoint and embroidery?
Which is easier embroidery or cross stitch or needlepoint?
Needlepoint, cross stitch, and embroidery are similar types of crafts. However, they have distinct differences. All of them use fabric. You will create stitches using a thread and a needle. So simply put, all three are needle arts.
How is needlepoint different from embroidery?
How does needlepoint differ from cross stitch?
Embroidery is a generalised term for needle art. It can simply be done on a piece of fabric. You can perform embroidery on various types of fabric. Given that you have the correct tools. Embroidery floss is popular and can be used to create beautiful embroidery projects.
Needlepoint is used on a tight canvas. Needlepoint is done on long-lasting projects. It’s usually performed on thick fabric and hard materials like handbags and belts. Needlepoint stitches are done diagonally starting at the bottom left corner to the top right corner.
Needlepoint uses decorative fibers. These are a lot rarer to find.
Cross stitch is done on a hoop. It is a finer form of needlework. It can be done on thin material like linen or cotton. You can also use weave fabric. Cross stitch stitches are intersected stitches. They form an X shape or a cross.
Cross stitch embroidery floss is made from cotton. The pattern uses a box-like design.
Which is easier cross stitch or needlepoint?
Cross stitch is easier to learn than needlepoint. This is because you only need to master the “X” shaped stitch.
With needle points, you need to learn various stitches. It creates more complex projects. Though a beginner can learn needlepoint. It will just take a lot more time and practice.
Cross stitch and needlepoint kits for children.
If you’re looking to get your kid started with cross stitch or needlepoint. Then you’ve come to the right place. Fabric8 has handpicked embroidery supplies for any skill level. Take a look at our wide range of hand embroidery supplies to get started.
How do I teach a child embroidery?
Here are 14 Tips for how to teach a child embroidery:
- Talk to them about embroidery
- Safety first
- Short lessons
- Let them choose the time
- Kids supplies
- Be patient
- Make it entertaining
- Make it quality time
- Scrap fabric
- Teach basic stitches
- Start small
- Use easy colours
- Group sessions
- Rewards
How to teach a child embroidery – embroidery step-by-step instructions:
1. Talk to them about embroidery
Insight is the best way to spark interest. Show them all the beautiful objects that were made by embroidering. Tell them all the benefits of embroidery for them.
2. Safety first
Although embroidery is generally safe, there are some precautions to follow. Take them through safety when handling scissors, needles, and sharp tools. Supervise them until they are mature enough to do it on their own.
3. Short lessons
Keep lessons short and sweet, just like your little one! Young children have short attention spans. Even if you can only get 10 minutes of their attention. 10 minutes a day adds up to a lifetime of skills.
4. Let them choose the time
Kids have schedules and internal clocks. Naptime, playtime, eat time. All of it needs to be considered before you choose when to make it embroidery time.
5. Kids supplies
Children’s supplies were made specifically with your kids’ abilities in mind. Don’t let them use your professional supplies. Get them their own kid-friendly embroidery tools.
6. Be patient
You kid won’t be a master in a week. They might even lose interest a few times. And they will start with many mistakes. Be patient with their little minds.
7. Make it entertaining
Do not make embroidery a task or a must. It needs to be their escape. It needs to be a fun hobby for them. That’s how they’ll stay consistent.
8. Make it quality time
If you can, learn with them. This is a great bonding experience for you and your child. If possible, let the whole household embroider together as a family quality time.
9. Scrap fabric
Let them practice on small scraps of fabric. This is easier to handle. It also allows them to go through trial and error at their own pace.
10. Teach basic stitches
Start them off with the basics easiest stitches. These are all easier for kids to learn. These include:
- Stem stitch
- Cross stitch
- Backstitch
- Running stitch
11. Start small
Start with easy big stitches. Small fabric. Easy tools. Basic projects. Short lessons. Keep it simple at the start.
12. Use easy colours
Kids are very imaginative and visual. Let them pick their colours. However, ensure you start with one colour. Later on, they can embroider with multi colours, designs, and fabrics.
13. Group sessions
If your kid is social, encourage this in embroidery too. Have a friend join them. Let them embroider at an embroidery class. Peak their social side to keep them interested.
14. Rewards
Reward hard work. Encourage them when they want to quit. And compliment them on their progress. This is how you keep them consistent.
How do you teach a child to cross-stitch?
What is a good age to start cross stitch?
A kid from 5 years and older can cross stitch. Usually their creativity, language, colour, and motor skills start developing at this age. It’s important to continually monitor them at this age.
Here are our 12 Tips for Teaching Kids How to Cross Stitch:
- #1 Tip: Let them choose their thread
- #2 Tip: Give them the freedom to pick their project
- #3 Tip: Show them a wide array of hoops and let them decide
- #4 Tip: Demonstrate with needle and thread
- #5 Tip: Supervise them always
- #6 Tip: Go through safety instructions
- #7 Tip: Be present and involved
- #8 Tip: Do it with them
- #9 Tip: Take them shopping for supplies
- #10 Tip: Patience is key
- #11 Tip: Reward them
- #12 Tip: Keep their sessions short
If you are interested in making your own cross-stitch patterns, then click here.
Embroidery and Stitching with Kids.
What stitch is used for embroidery?
There are various stitches available for embroidery. There’s a stitch for different levels of embroidery. Your stitch will also depend on the type of embroidery you do and the level of embroidery skills you have.
What are the 16 basic kinds of embroidery stitches?
The 16 basic hand embroidery stitches for beginners are:
- Backstitch
- Satin stitch
- French knot
- Running stitch
- Stem Stitch
- Whipstitch
- Catch stitch
- Chain stitch
- Lazy daisy
- Woven wheel
- Blanket stitch
- Base stitch
- Invisible stitch
- Split stitch
- Tatami stitch
- Bonus stitch: Feather stitch
Kids embroidery supplies.
What hand embroidery supplies do you need to get started?
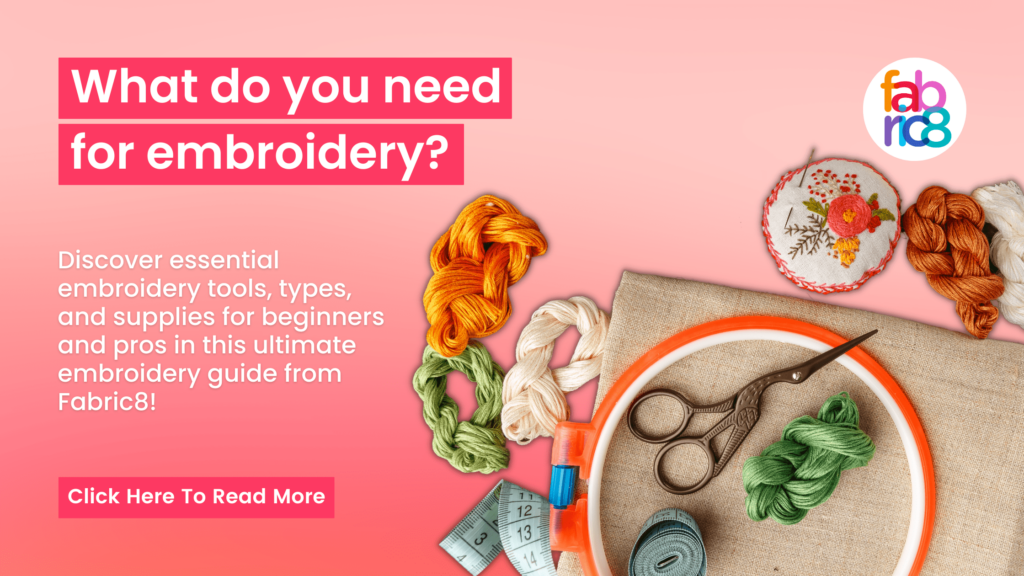
Here are 20 Essential hand embroidery supplies:
- Needle storage
- Embroidery hoops
- Scissors
- Embroidery floss
- Embroidery needles
- Fabric
- Floss bobbins
- Floss organiser
- Floss ring
- Fabric markers
- Notebook
- Stabilizer paper
- Metal rings
- Thread organiser
- Canvas
- Punch needle
- Pins and pegs
- Needle threader
- Floss winder
- Floss card
You can purchase all these supplies at Fabric8. Shop over 3000 spesialised crafting items at www.fabric8.co.za.
Can kids embroider with a hoop?
Can you embroider without a hoop?
You can embroider with or without a hoop. Embroidery with a hoop is used in cross stitching. However, you can also do needlepoint embroidery that uses a canvas instead of a hoop.
You can also embroidery on fabric without any hoop or canvas. This will be a lot more difficult and will lead to sloppier work. It will also take more time. Although it is not recommended, it is possible.
What type of cloth is best for embroidery?
The fabric you use when embroidering is what makes or breaks your project.
This is why we’ve compiled a list of the 15 best types fabrics for hand embroidery:
- Felt
- Cotton
- Linen
- Silk
- Polyester
- Wool
- Acrylic
- Rayon and polyester blend
- Bamboo
- Yarn
- Canvas
- French terry cloth
- Plastic
- Aida
- Fiddler’s cloth
The best embroidery fabric for beginners.
What type of fabric is best for embroidery?
With this long list of 15 options, you might wonder what fabric should a beginner start with. We’ve narrowed this long list down to 4 best embroidery fabrics:
- Linen
- Wool
- Cotton
- Silk
Linen, wool, cotton, and silk are all natural woven fabrics. These are ideal for beginners. This is because they are easy to start with. You can select between tightly woven and loosely woven depending on the type of embroidery you want to perform.
What can I embroider with kids?
What can you make out of embroidery?
What can I stitch for kids?
The best part of embroidery is the endless options! With the right supplies and skills, you can embroider anything.
Let’s start your little ones off nice and easy. Below are our top pics of fun embroidery projects for your kids to get started with.
Fun embroidery projects for kids.
Here are the 20 free simple embroidery projects for children with patterns:
- Handprints
- Ice cream
- Treasure maps
- Pony
- Handmade medals
- Mushroom art
- A sailing ship
- Embroidery felt chocolates
- Panda art
- Mountain
- Rainbow
- Star Wars
- Butterfly design
- Heart
- A ladybug
- Toy sleeping bag
- Cute duck
- Pencil case
- Bookmark
- Fish design
Embroidery kits for kids.
Kids Hand Embroidery Starter Kit
The ideal embroidery kit for kids includes:
- Embroidery frame
- Cute hold-all container
- Buttons and beads
- Colourful scissors
- Fabric
- Printed pattern
- Embroidery thread
- Hand embroidery needles
- Printed instructions.
We stock various hand embroidery kits perfect for children of all ages. They can select from button tree, cupcake, rainbow, followers, and bee kits.
These kits allow them to express their creativity on every level. It contains all the basic supplies your child needs to get started.
Shop kids’ embroidery kits.
Kids embroidery supplies near me.
Where can I buy embroidery kits online?
Fabric8 is a local South African Shop. We stock over 3000 creative supplies. Whether you are shopping for a beginner kid. Or for your sewing business. You can find everything you need on our online page.
We stock embroidery floss, storage solutions, tools, hoops, embroidery scissors, embroidery needles, and so much more. Get all your embroidery needs met at our one-stop shop just click here and start your embroidery journey!


